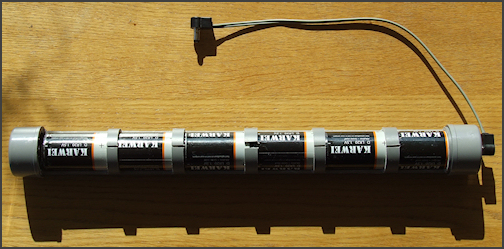
The Novag Citrine is a handsome table top chess computer with a wooden auto sensory board. It is nice enough to have it somewhere in your living room on a table, but I thought it would be even nicer to have it built into a chess table.
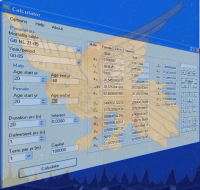
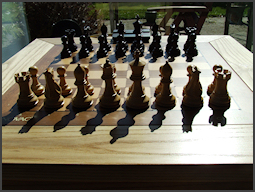
Here is a picture of my Citrine before it was turned into a table:
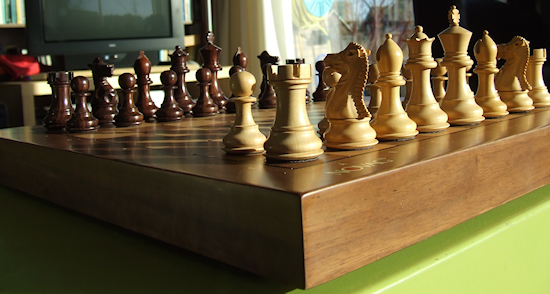
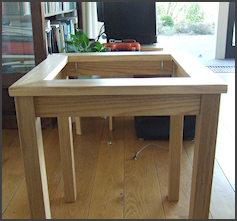
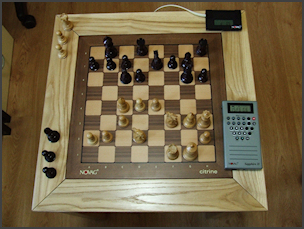
And here you see the Citrine turned into a table:
I chose a light oak wood for my table because it is not too expensive and is easy to work with. The light color of the table makes for a nice contrast with the dark parts of the Citrine.
I had the miter cuts of the frame done at a wood store. I told them to make sure the inner width to be 37 cm. This turned out to be to tight a fit for the Citrine. I had to sand the four sides a little bit to make the Citrine fit.
Because I wanted the on/off button and menu button on the side of the table, I had to do some wiring inside the Citrine. I am sure this will void the warranty.
Also I wanted to get rid of the adaptor, so I did a home made battery back using 6 large 1.5v batteries.
Building the table
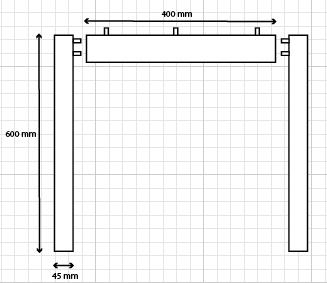
The legs of the table are 45 mm thick and 600 mm long bars. They are joined together with 22 mm thick planks. The joints are reinforced with dowels.
I attached the planks about 10 mm inwards to get a nice classic look.
The dowels you see on top of the planks are later used to hold the table top frame in place.
I first made the two benches separately and then joined them together with the remaining two planks.
The table top frame consists of four planks of 22 mm with a 45 degree miter cut.The inner width of the frame should be 370 mm or a little bit less.
When the frame is in place you can use your sanding machine to precisely fit the Citrine.
You could join the planks together with dowels and glue, but I just attached each plank to the base of the table separately.
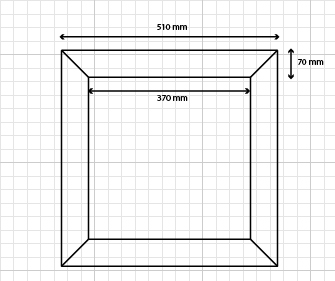
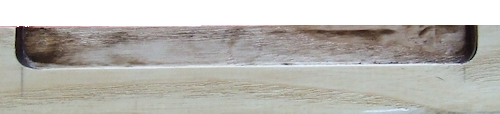
To allow for some space for the Citrine’s buttons and connectors, I cut out a part of one of the frame planks. The Citrine is fitted into the frame from the bottom up and there should be enough space to plug in the wires.
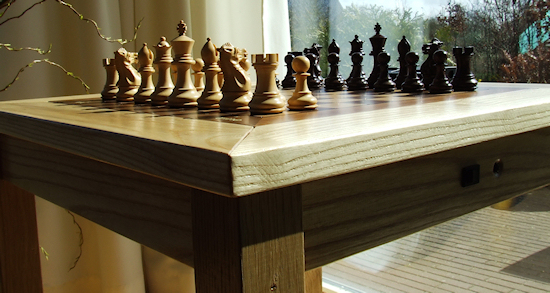
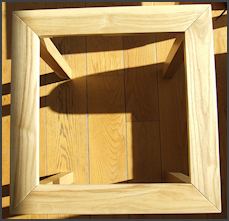
Here you see the finished table from the front and from the top:
Next is rewiring the Citrine to get the buttons on the side of the table working. I’ll explain about the battery back and show how I fixed the Citrine into the frame.
Rewiring the Citrine
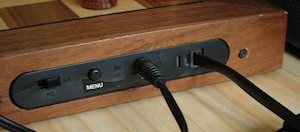
The Citrine has a panel on the right side with connectors and switches.
When the Citrine is fitted into the table that panel will no longer be easy reachable. I wanted the on-off button and the menu button to be relocated to the outside of the table.
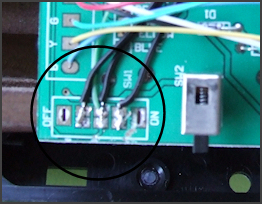
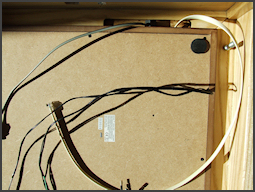
The first thing I planned was connecting wires to the existing buttons.
This didn’t work out for the on-off button since that turned out to be a so called on-on switch. When you switch the button on, another connection is switched off.
That is why I had to remove the on-off switch from the print. If someone has a solution where you can leave the switch in place please let me know!
The menu switch is a simple momentary switch, so no problem here. I attached two wired to the print and lead them to the new switch on the table.
I hope these pictures are clear enough to show what I did:
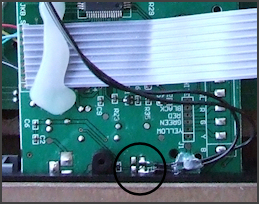
With the wiring done I made a small hole in the hardboard cover to lead the wires through, and closed up.
Battery Pack
Another thing I wanted to do is to get rid of the adaptor. I think a classic chess table with a black wire comming out of the side is not very nice. The ideal solution would be to make a recharcheable battery pack, and have the Citrine charge overnight so at daytime I could use the table without wires. When the batteries would run out I wanted to be able to switch to the adaptor. But I didn’t end up doing that. Mainly because I don’t know how to do it. So I settled for a removable battery back that I could load with either rechargeable or normal batteries.
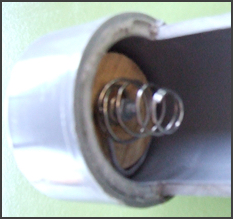
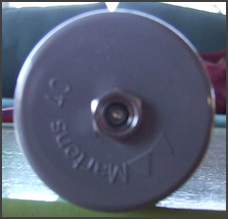
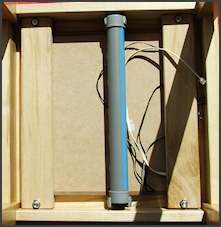
The battery pack is made of a 400 mm PVC sewer pipe. Remarkably, the large round1.5v D (or LR20) batteries exactly fit into this pipe. I cut out spaces to easier fit the batteries. At both ends I glued on end caps, and attached a spring to one end and a 5.5/2.1 mm female connector to the other end. A wire runs on the outer side of the pipe from the spring to the connector.
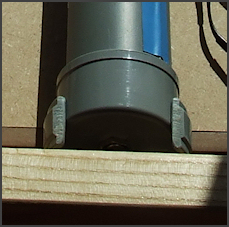
I used two plastic clamps that are normally used to fit the sewer pipe to a wall. Cut off the “feet” of the clamps and attached them to the bottom of the table. Now the battery pack can be easily removed to refill with new batteries.
The only thing left is assembling the table. On the next page I’ll show how I fitted the Citrine into the table, connected it and played my first game on it.
Assembling
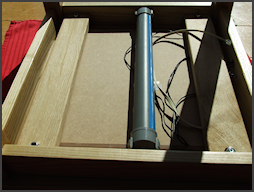
The Citrine is fitted into the top of the table from the bottom up. I made two planks and attached them to the bottom to secure the Citrine. The planks are attached to the bottom using 4 KOMBI wood screws. They have a bolt wire on one side and a wood screw wire on the other side. You screw them in using a Torx screwdriver. Because of the hardness of oak wood it is advisable to predrill the wood. To fix the screws I dipped them in a bit of construction glue before screwing in. This hopefully will also prevent the screws from rusting.
The planks are U-shaped and the legs of the U must be the right height to fit in the Citrine exactly level with the frame. To have a little bit of a margin I used some rubber on the legs to. This gives me about a millimiter of adjustable height. By tightening or loosening the nuts I can raise or lower the Citrine somewhat.

In the right side of the table I made two holes to fit the on-off switch and the menu button. I am not very happy with the menu button and I am planning on replacing it with a nicer looking one.

One problem to solve is the LCD display of the Citrine. At first I wanted to build the display into the table somehow. But later on I decided not to do that to keep the table as natural as possible. So I settled for a solution where I use the display when I need it simply lying on the table. The Citrine comes with a ridiculously short cable to connect the LCD display, so I had to make a longer cable. To do this you need two RJ11 plugs and a flat cable with 6 wires. The cable is a crossover or reversed configuration. If you do not have the special tool used to attach the connectors you can push in the little copper connector knives one by one using a small electrical screwdriver (as I did).
Next I connected the power cable and the display cable, turned the table upside down and lowered the Citrine into the frame. I screwed on the U shaped planks and connected the wires to the on-off switch and the menu button. Finally I clicked the battery pack into the clamps and connected the power cable to it.
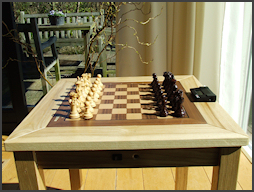
To finish this story about the Citrine table I included the first games with the table. The first game is at level at4, which is 15 seconds a move. This game I won. To not spoil the first day as a table for the Citrine, I played another game at level tr7, which is 40 moves in 2 hours. I think that game is a draw. The third game is a game I let the Citrine play against my older Novag Sapphire II. Both the computers are set at level tr3 (40 moves in 30 minutes. This was not finished, but would clearly be won by the Sapphire. And finally a game between the Citrine and my Saitek Turbo Advanced Trainer. Both set at 30 seconds a move. This game was won by the Citrine!
I hope you liked these pages. If you have a question or did a similar or other interesting project with the Citrine I would be happy to hear about it. You can reach me at feedback(at)davitools.com.
Citrine Table vs Novag Sapphire II
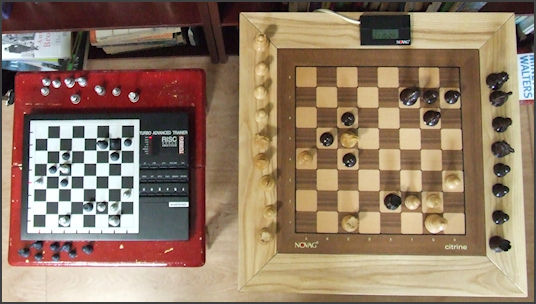
Citrine Table vs Turbo Advanced Trainer